Saturday, May 28, 2011

Our Living Room

The living room was in pretty good shape except for the floor.  Most of the door casings and baseboards were intact although not always in their original place or condition.  As I shared earlier most of the walls had been sheetrocked over the original brick and plaster.  The ceiling has also been lowered from 11 to 10 feet to accommodate copper pipes and electrical wiring.  This is also the room where we installed the elevator.  However the electrical lines violated code by being laid in channels in the floor and then covered with carpeting.  The lines went to large ugly plug boxes mounted on the walls. 

Original front room condition with hot water baseboards
and sheetrock boxes to hide pipes

Getting some measurements

Fireplace and original trim around doorways
and windows

View into dining room

Showing where the elevator and
furnace will be

Breaking the law and a potential fire hazard

Getting ready to frame the elevator
The big job for me was leveling the floor.  From the edge of where the fireplace is located to the front window  the floor dropped about 3 inches in the space of eight feet.  I really wanted to ignore the problem but since we were putting down hardwood floors that wasn't an option so in the summer of 2007 I started tearing up the floor to discover the problem and then correct it.  I discovered the problem in most cases was sagging and settling floor joists however the joist next to the front wall was completely rotted through from being in close contact with the exterior wall.  I replaced that joist and made it level with the rest of the floor which then allowed me to measure the thickness of each shim I needed to create for each joist in order to level the floor.

Tear up carpet and overlayment to get to the
original floor (poor grade softwood)

Down to the joists

Under the floor

Now the rebuilding starts


Maybe this explains why to floor drops
As I review this post and look at this picture I find myself forced to add an additional comment.  If you've read my post on the elevator installation you know we had untold problems with the company that we purchased the elevator from.  After mid 2005 I thought we were finally free of them but they came back to haunt me in January, 6 years later.  The photo above shows two white wires.  One is the new phone wire I ran into the house.  In January I changed my phone and internet service to Qwest but I couldn't get a buzz out of my phone.  I called Qwest and they promptly sent out a technician who initially thought it was the outside line but he eventually determined that the problem was in the house and asked me about the two white wires leaving the box.  I told him one was the new phone wire I had run but I didn't remember the second one.  He informed me that it was thermostat wire and the cause of the buzzing.  It was then that it hit me that elevators require a phone in case of a breakdown and the company had just run thermostat wire because it was cheaper than phone wire.  So I disconnected the wire, got rid of the buzz and ended up paying Qwest a $100 service fee because the problem was inside the house and not covered.  Sometimes even ghosts can come back to bite you.

My totally rotted joist and an old heat duct

Shimming the floor

Trying to keep it level

Laying a new subfloor

Hopefully this corrects the floor problem for another 100 years.  Once the floor was level we were ready to lay the new hardwood flooring that had been setting in either our front room or garage since the fall of 2004.  That's a case of being overly optimistic about how quickly the remodeling process will progress which is a common error most remodelers make.  The good thing is the flooring had plenty of time to acclimate.  We bought Santos Mahogany from Lumber Liquidators because we liked the grain and color and because it's twice as hard as oak.  Their claim about the 50 year finish appears to be valid as we've seen no wear except for where we've incurred some minor damage.

Originally we were planning to lay the floor ourselves but ran into one of those "burn-out" times where we felt like we couldn't do one more thing at the time but didn't want to wait any longer.  We ended up hiring someone to lay the floor and generally were very happy with the job - the one exception being they face nailed in several places in a way I wish they hadn't.

Getting started

Looking from the dining room into the living room

View from the living room into the dining room

View into the foyer

The copper pipe, baseboard heaters and sheetrock boxes had to be removed and the walls patched in three places before painting could take place.  We installed the electrical outlets back in the floor and removed the wall boxes.

Cutting in the edges

Finally a living room after 3 1/2 years

The elevator wall

I think Chris and I agree the most beautiful feature of the entire house is the oak fireplace in the front room which somehow in spite of everything else done to the house remained in almost perfect condition. Some of the original tiles were loose so the man who did the foyer floor came and removed and then reinstalled each piece.  He covered all the tile with painters tape then outlined each tile and numbered them before removal so each piece went back into its original position.

The mantle is quarter sawn oak much of it in a tiger pattern.  There is also a nicely carved Pan figure and other carved and fine woodworking details.

The clock was my great-grandfather's

We'll install a gas-burning coal basket

And this final picture demonstrates the kind of atmosphere most of us Victorian remodelers dream about.

Our first Victorian Christmas


Sunday, May 22, 2011

The Porch

The original porch
This is the porch as it appeared in the late 1800's to early 1900's.  When we purchased the house the porch had been removed and there was a cement slab the width of that portion of the wall.  The transom over the front door had been sealed off and shingled over with rough cedar.

Note shingled  transom

One of the positive aspects of our purchase was that the previous owner had to put on a new roof.  In the process the old layers had been torn off but when the new shingles were laid they now fell short of the gutters and consequently all the moisture dripped between the shingle edge and the gutters.  The house faces north so we had serious ice buildup on our porch.  To solve the problem that first winter I quickly put up what we called the stable.  It looked fine for Christmas but other than that I'm sure the neighbors wondered what the new owners were planning!

The Stable

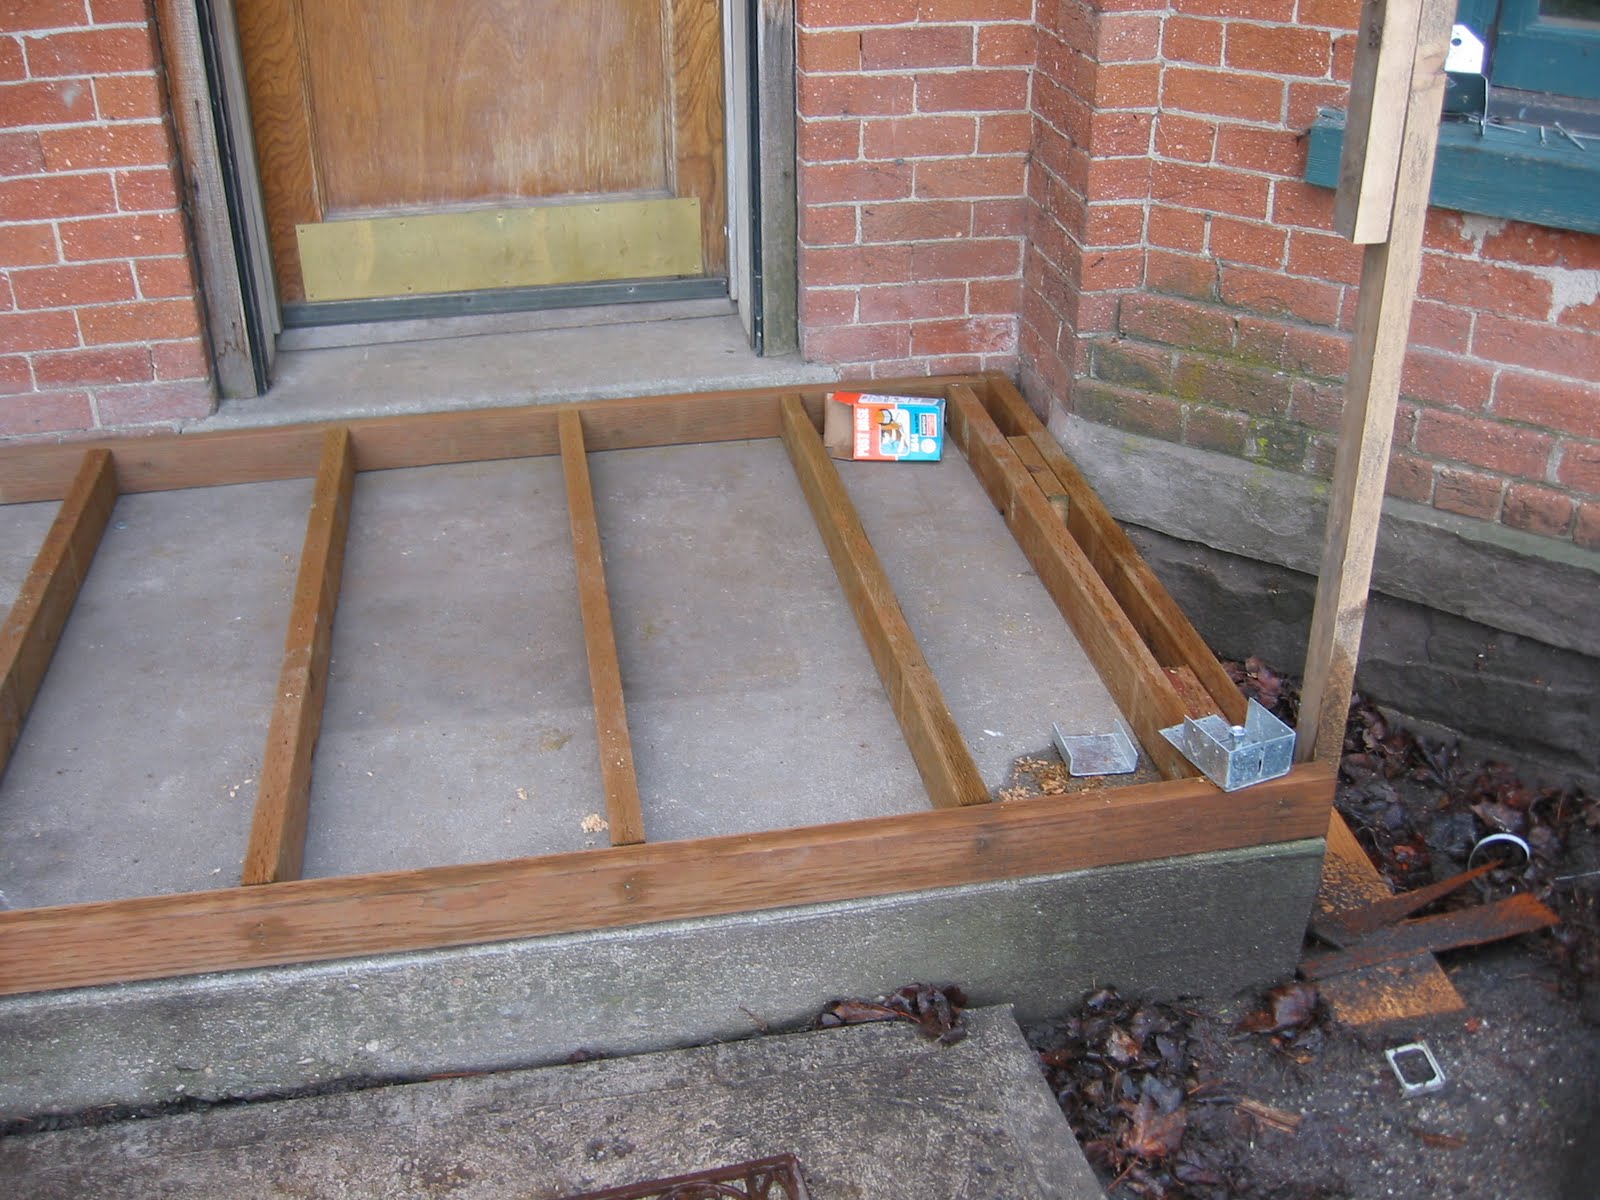
We initially hired a contractor to help get a garage built and an elevator installed and he suggested that instead of rebuilding the original porch we enlarge it and make it L-shaped to give us more usable space.  We thought it was a great idea and I drew up plans for a building permit.  During this time the Anderson's began attending our church; she was on sabbatical from a college back east for the school year and he came along with her since he was an independent remodeler and could work anywhere.  He hadn't found much work and was getting bored sitting in their little apartment so we hired him to do some of the bigger building jobs we were undertaking - one was framing the porch.

We decided to not pour a cement slab as a base but instead to use Trex for a more traditional wood look.  So here's photos of the rough framing.


During this time I was also able to find composite molding that matched the window trim so I was able to cleanup, trim and paint around the front door as well.

The cat came with the house

The porch remained essentially in this rough condition for about two years while we worked on other projects.  It was framed during the Spring of 2005 and when I retired/took disability in September of 2008 I started working on the finishing details.  For all intents and purposes it was finished in the Fall of 2010 but a few small finish details remain.  We've found 3-5 years from start to finish on one of our projects is not unusual. 

Between cost and liking to work with my hands we determined I would construct the spandrels and railings myself.  Again the internet was invaluable as I found oak balusters for $1 a piece and was able to buy dozens of turned dowels at very good prices.  Next I'll show how I built jigs and constructed the spandrels and railings.

Jig for dowel spacing


I centered the first dowel on each spandrel
and worked outward for balance.


Bought the curved quarter sections at Lowes

A paint sprayer and son-in-law helps


Will eventually add lattice-work underneath
Four jobs remained at this point, an inset pattern on the front triangle, lattice trim at base, interior ceiling and refinishing the exterior of the door.  The door had carved features, some parts missing and other parts cracked and separating and the finish was seriously deteriorating.  Some parts I was able to fill and missing parts I hand carved to match.  If you look carefully you can see that the etching on the glass matches the wood carving.  As I mentioned in an earlier blog the stained glass in the transom made by our oldest daughter also repeats the pattern.

For the interior ceiling we went with bead-board paneling for appearance and cost saving (that not unlimited budget) but we're very happy with the look.

Gluing loose pieces back on

Attaching newly carved pieces

Refacing rotted surfaces

The finished product

Painting the ceiling


Nothing like a cup of coffee on our porch on a beautiful summer morning!